How to find every power moon in the Sand Kingdom
Welcome to the Sand Kingdom Power Moon Locations Guide for Super Mario Odyssey! This guide organizes the Power Moons by their locations and requirements, offering detailed instructions so you can collect every single one in the Sand Kingdom.
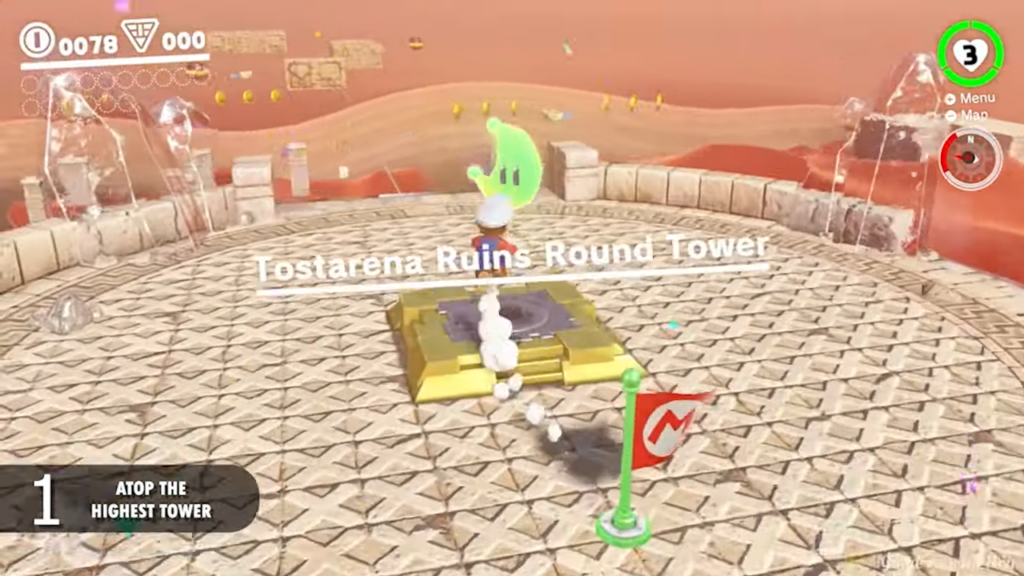
Atop the Highest Tower
This is your first quest in the Sand Kingdom. Simply head toward the large tower marked as your waypoint. Ascend the structure using the platforms, jumps, and lifts. Once you reach the top, you’ll see the Power Moon waiting for you. This serves as an introduction to the Sand Kingdom’s mechanics.
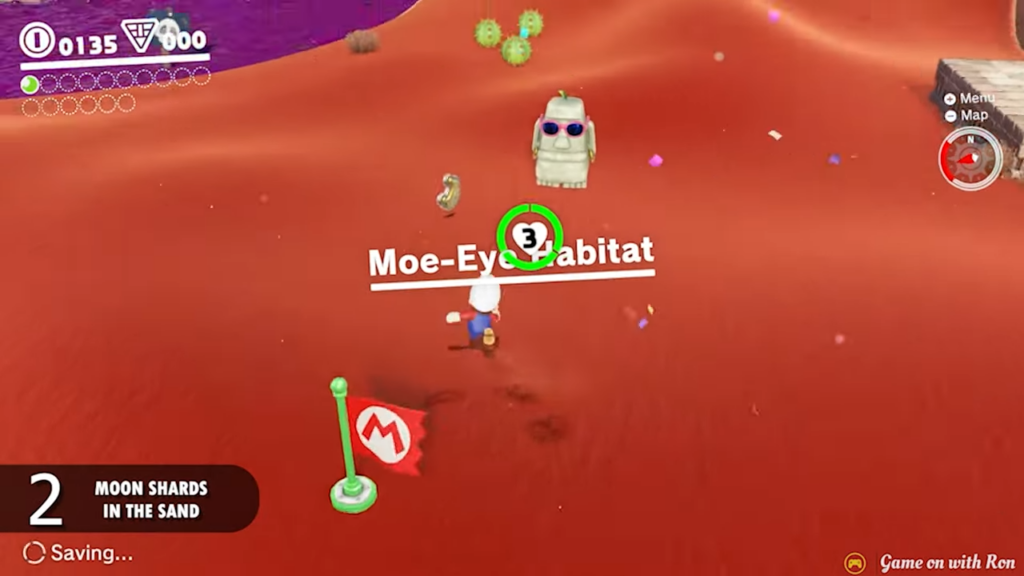
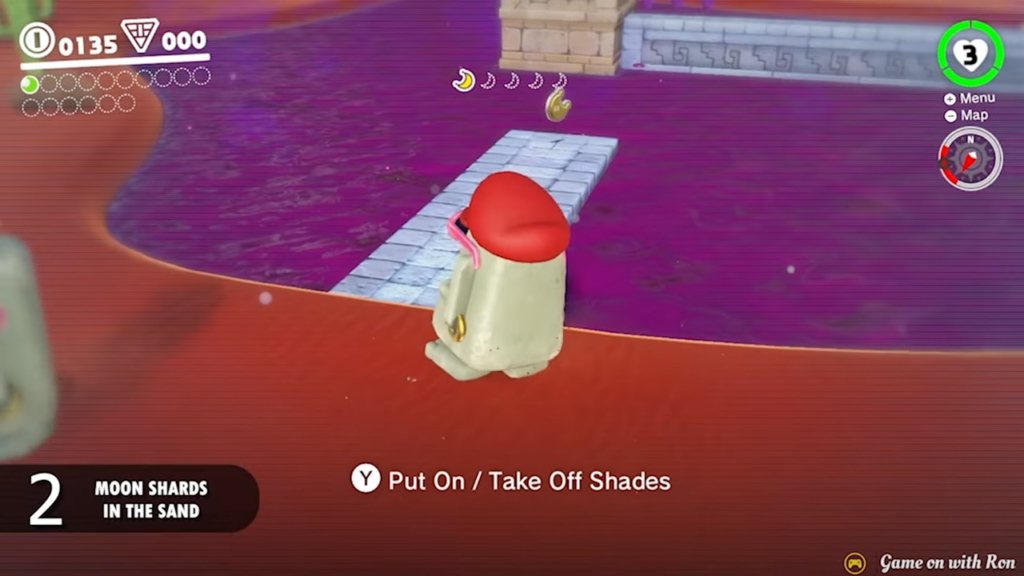
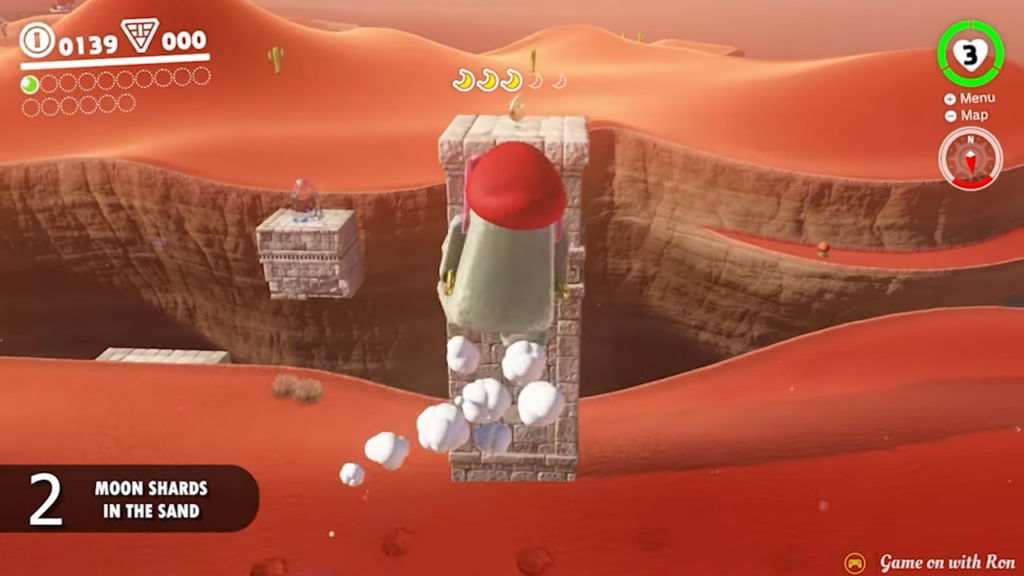
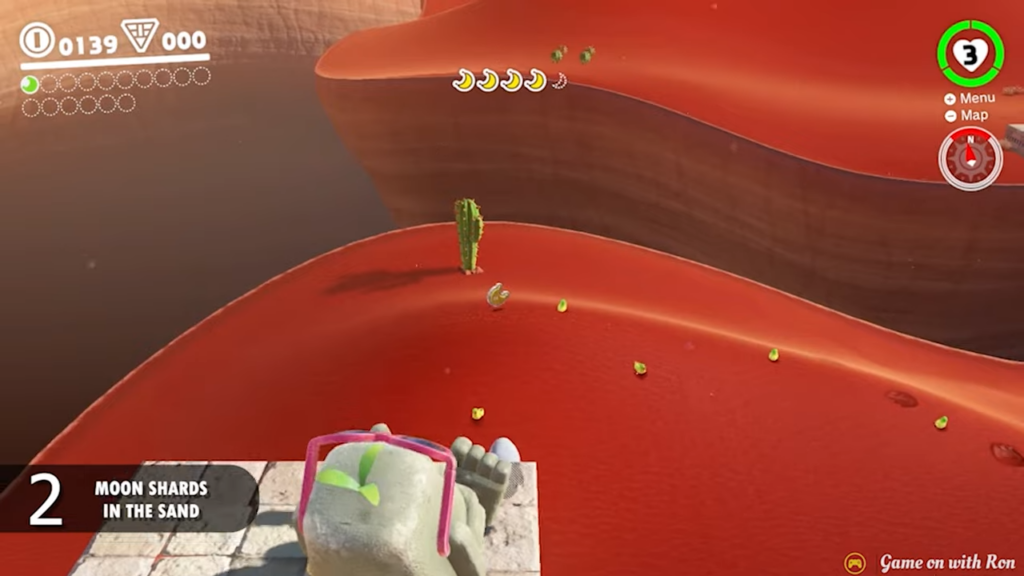
Moon Shards in the Sand
You’ll need to collect five Moon Shards for this Power Moon. These shards are located around the poison lake. While most are easy to find, the last one requires capturing a Moe-Eye (the stone creature with sunglasses). Use its ability to reveal a hidden path on the pillars above the lake. Walk along this path to find the final shard.


Showdown on the Inverted Pyramid
Climb the Inverted Pyramid, where you’ll encounter Harriet from the Broodals. After a fun boss fight involving dodging bombs and using Cappy to return them, you’ll earn a Multi Moon as your reward.
4. The Hole in the Desert
Once you defeat Harriet, a giant hole will open beneath the Inverted Pyramid. Enter the hole to find an underground area filled with challenges. Make your way through, defeating enemies and navigating icy platforms. At the end, you’ll face a boss battle against Knucklotec, a pair of massive stone hands. Defeat him to earn another Multi Moon.
5. Overlooking the Desert Town
In Tostarena Town, look for a bell tower at the rear of the town. A dancing Tostarenan with a boombox will mark the location. Climb the tower and claim the Power Moon sitting at the top.
6. Alcove in the Ruins
Head toward the ruins, where you’ll see three sand geysers leading toward a tall structure. Instead of crossing the gap, look behind the structure. Navigate around the back by hopping along the sand. Hidden in an alcove is the Power Moon, waiting to be claimed.
7. On the Leaning Pillar
In the ruins, find a Bullet Bill launcher on an adjacent platform. Capture a Bullet Bill and steer it toward the leaning pillar, where the Power Moon is located. Simply guide the Bullet Bill to the pillar to collect the Moon.
8. Hidden Room in the Flowing Sands
This Power Moon is cleverly hidden. In the ruins, head to the area with the three sand geysers. From here, follow the tower wall to the right, where you’ll find a narrow gap between the building and the sand. Allow Mario to sink into the quicksand until his head is under the gap. Then move forward and jump repeatedly to reach a hidden room with the Power Moon inside.
9. Secret of the Mural
Inside the 2D mural that spirals around the tower, look for a moving platform near the exit. Instead of hopping out of the mural, wait for the platform to meet the wall on the left side. Jump through a small gap, and you’ll find the Power Moon hidden in this secret area.
10. Secret of the Inverted Mural
As you ascend the Inverted Pyramid in 2D mode, you’ll encounter two green pipes near the top. Ignore these pipes and jump through the crack in the wall to your left. The camera will swing around to reveal a hidden passage with a Power Moon.
11. On Top of the Stone Archway
From Tostarena Town, use the power lines to zip toward the ruins. Look for a long power line stretching over the archway near the ruins’ entrance. Jump off the power line at the right moment to land on the archway and grab the Power Moon.
12. From a Crate in the Ruins
After passing the first 2D mural in the ruins, look for a group of crates near a Bullet Bill launcher. Ground pound the glowing crate to reveal a Power Moon. The Moon will fly to a nearby platform, so capture a Bullet Bill to follow it and claim your prize.
13. On the Lone Pillar
After defeating the Broodal boss atop the pyramid, head to the Tostarena Ruins Tower checkpoint. Capture Glydon (the flying lizard) and glide to the lone pillar to the east. Land on the pillar to collect the Power Moon.
14. On the Statue’s Tail
Return to the top of the Inverted Pyramid after defeating the bosses. In the northwest corner, you’ll find a Jaxi statue with a glowing tail. Throw Cappy at it and hold the throw button until the Power Moon appears.
15. Hang Your Hat on the Fountain
After restoring the flow of water in Tostarena Town, head to the fountain in the center. Throw Cappy at the top of the fountain and hold the throw button. The Power Moon will eventually pop out.
16. Where the Birds Gather
At the Oasis on the eastern side of the map, look for a group of birds resting on a mound of sand. Once they fly away, ground pound the mound to uncover the Power Moon.
17. Top of a Dune
Head to the southwest corner of the Sand Kingdom, where you’ll find the tallest dune. Walk along its peak until your controller’s rumble becomes strongest. Ground pound the area to reveal the Power Moon.
18. Lost in the Luggage
Look for a glowing spot near the frozen taxi in front of the Inverted Pyramid. Ground pound the glowing sand to reveal the Power Moon. If the ice has melted, the spot will still glow near some luggage.
19. Bullet Bill Breakthrough
In the ruins, capture a Bullet Bill near the Goombette. Guide it toward a hole in the stone lattice to reach a cage containing the Power Moon. Smash the cage to claim your reward.
20. Inside a Block Is a Hard Place
Near the Tostarena Ruins Sand Pillar checkpoint, you’ll find a glowing block. Capture a Bullet Bill and use it to smash the block, revealing the Power Moon hidden inside.
This guide continues with the remaining Power Moons in a similarly detailed fashion. Let me know if you’d like me to expand on specific numbers or continue the list further!
21. Bird Traveling the Desert
Look for a glowing bird flying around the southern area of the map between Tostarena Town and the Oasis. Stand on a high vantage point, like a rooftop or a palm tree, and wait for the bird to fly near. Throw Cappy at it to make it drop the Power Moon.
22. Bird Traveling the Wastes
Another bird is flying near the large poison lake on the northeast side of the map. Use the same method as before: stand on a high spot, track the bird’s path, and hit it with Cappy to collect the Power Moon.
23. The Lurker Under the Stone
Return to the top of the Inverted Pyramid after defeating Harriet. You’ll notice a moving bump on the ground, circling the area. Throw Cappy to stun it, then ground pound the bump to reveal a Power Moon.
24. The Treasure of Jaxi Ruins
Enter the quicksand whirlpool in the ruins to access the underground ice cave. Navigate through the entire cave until you reach the exit, where two treasure chests await. Open the chest on the left to reveal the Power Moon.
25. Desert Gardening: Plaza Seed
In Tostarena Town, you’ll notice three flower pots under the Crazy Cap store. Nearby, you’ll find a seed in the plaza. Pick up the seed and throw it into one of the pots. Wait for the plant to grow fully, and you’ll receive a Power Moon.
26. Desert Gardening: Ruins Seed
Find a second seed in an alcove on the eastern side of the ruins. Bring it back to the flower pots in Tostarena Town. Repeat the same process as Power Moon 25 to eventually collect your reward.
27. Desert Gardening: Seed on the Cliff
For the third seed, head to the southwest side of the map. Look for a small ledge on a cliff, where the seed is waiting. Once you’ve grabbed it, use a trampoline nearby to return to higher ground and carry the seed back to Tostarena Town.
28. Sand Kingdom Timer Challenge 1
At the top of the northwest ruins, find a scarecrow and throw Cappy at it to start a timer challenge. Roll and jump quickly to reach the Power Moon before time runs out.
29. Sand Kingdom Timer Challenge 2
Near the poison lake in the southwest Moe-Eye area, find a P-Switch. Step on it to reveal a hidden path leading to a key and the Power Moon. Use the Moe-Eye’s sunglasses to navigate the invisible path.
30. Sand Kingdom Timer Challenge 3
Find another scarecrow on the eastern side of the poison lake. Throw Cappy onto it to activate the challenge. Use the blocks that appear to cross the lake and grab the Power Moon before the timer ends. If it’s too tricky, summon a Jaxi to safely cross the poison.
31. Found in the Sand! Good Dog!
After defeating both bosses in the Sand Kingdom, you’ll notice a dog near the Odyssey. Follow the dog as it digs into the sand. When it stops and uncovers a glowing spot, ground pound the area to collect the Power Moon.
32. Taking Notes: Jump on the Palm
In the Oasis area, find a large treble clef sitting on top of a palm tree. Climb the tree, activate the treble clef, and collect all the musical notes that appear to unlock this Power Moon.
33. Herding Sheep in the Dunes
Near the Inverted Pyramid, you’ll find a Tostarenan worried about his missing sheep. Three sheep are scattered in the dunes nearby. Guide each sheep back into the stone circle by running behind them or hitting them lightly with Cappy. Be careful not to hit cacti, as the sheep will scatter if they do.
34. Fishing in the Oasis
Head to the Oasis and capture the Lakitu floating above the water. Cast the fishing line where you see large shadows in the water. Reel in a large fish to uncover the Power Moon.
35. Love in the Heart of the Desert
Find a Goombette in the ruins near the Bullet Bill launchers. Capture a Goomba, stack it with other Goombas, and carefully navigate the ruins to approach her. Once she notices your Goomba stack, she’ll reward you with a Power Moon.
36. Among the Five Cactuses
Ride a Jaxi to the northern part of the desert, where five cacti are lined up in a row. Smash the tall cactus in the middle with the Jaxi to reveal the Power Moon.
37. You’re Quite a Catch, Captain Toad!
Capture the Lakitu in the Oasis and head north to the sand dunes. Look for a large moving shadow in the sand and fish it up. It’s Captain Toad, and he’ll give you a Power Moon as thanks.
38. Jaxi Reunion!
Find a Jaxi statue northeast of the Oasis. Ride a living Jaxi to the platform next to the statue, and you’ll earn a Power Moon.
39. Welcome Back, Jaxi!
Ride the power line to the top of the Inverted Pyramid, where you’ll find a Jaxi Stop. Summon the Jaxi and ride it to the corner of the pyramid that lacks a statue. This will reward you with a Power Moon.
40. Wandering Cactus
Just north of the Oasis, you’ll find a cactus with a glowing green button on its top. Throw Cappy to capture the cactus and move it. Ground pound the glowing spot left behind to reveal the Power Moon.
41. Sand Quiz: Wonderful!
Return to the Sphynx after answering its initial question (Power Moon 51). Speak to it again, and it will ask more questions. Answer correctly to earn the Power Moon:
- 30
- Ice
- 5
- Sphynx
42. Shopping in Tostarena
Visit the Crazy Cap store in Tostarena Town. Purchase this Power Moon for 100 coins. It’s as easy as that!
43. Employees Only
Behind the Crazy Cap shop, you’ll find a busted grate. Crouch to enter and follow the path. This leads to the shop’s counter area, where the Power Moon is waiting.
44. Sand Kingdom Slots
Enter the slot building in Tostarena Town. Play a round of slots for 10 coins. Use Cappy to hit the moons on the reels. Line up three moons in a row to win the Power Moon. Standing on the left side of the room can help with timing.
45. Walking the Desert!
Talk to the sombrero-wearing Koopa northwest of the Oasis to start the Trace Walking Challenge. Your goal is to walk along a disappearing circle to score at least 80 points. Use nearby cacti and shrubs as landmarks to guide your steps.
46. Hidden Room in the Inverted Pyramid
While inside the Inverted Pyramid, navigate the Bullet Bill section with moving pillars. Capture a Bullet Bill and aim to land on a hidden platform to the left of the conveyor belt. This will lead you to a secret room with a Power Moon.
47. Underground Treasure Chest
In the underground ice cave (beneath the Inverted Pyramid), you’ll come to a section with two sets of Bullet Bills. Use the second Bullet Bill to fly to the far right, where you’ll find a small set of steps leading to a treasure chest. Inside is the Power Moon.
48. Goomba Tower Assembly
In the same underground cave as Power Moon 47, stack Goombas to create a tall tower. Use this tower to jump and reach a Power Moon floating in the air.
49. Under the Mummy’s Curse
After defeating all the bosses, head north of the desert to find a large hole guarded by Tostarenans. Jump down and defeat waves of mummies until a Power Moon appears.
50. Ice Cave Treasure
Enter the quicksand whirlpool in the ruins and navigate the ice cave. Near the end, look for pillars stacked vertically. Use precise wall jumps to climb to a higher level and find the Power Moon on a ledge.
51. Sphynx’s Treasure Vault
Visit the Sphynx on the northwest side of the ruins. Answer its question correctly (the answer is “Coin”), and it will open the way to a treasure vault. Inside, you’ll find the Power Moon.
52. A Rumble from the Sandy Floor
Near the green pipe by Talkatoo in Tostarena Town, enter the underground room. Use your controller’s HD Rumble to detect vibrations in the floor. Ground pound the strongest vibration spot to uncover the Power Moon.
53. Dancing with New Friends
Purchase and wear the Sombrero and Poncho from the Crazy Cap store. Head to the northwest corner of Tostarena Town, where a resident guards a door. They’ll let you in if you’re in costume. Inside, join the party to collect the Power Moon.
54. The Invisible Maze
North of the Moe-Eye area, look for a red door near a canyon. Inside, use the Moe-Eye’s sunglasses ability to navigate invisible paths in a poison-filled maze. Successfully reach the end to claim the Power Moon.
55. Skull Sign in the Transparent Maze
In the same invisible maze as Power Moon 54, you’ll see a skull sign on the wall in the first room. Stand in front of it, throw Cappy at the sign, and hold the throw button until the Power Moon appears.
56. The Bullet Bill Maze: Break Through!
On the northwest wall of the ruins, you’ll find a red door. Inside, use the Bullet Bills to navigate a maze filled with rotating walls and poison. Take your time and carefully make your way to the end, where a Power Moon awaits.
57. The Bullet Bill Maze: Side Path
In the same maze as Power Moon 56, look for a side path to the left before the first set of rotating walls. Capture a Bullet Bill and fly through this narrow path to find another Power Moon.
58. Jaxi Driver
Head to the Jaxi Ruins checkpoint and capture a Jaxi. Enter the nearby poison lake cave by jumping off the Jaxi platform. Navigate through the area using the Jaxi’s speed and precision to reach the end, where the Power Moon is waiting.
59. Jaxi Stunt Driving
While inside the same poison lake cave as Power Moon 58, find a large treble clef in the center. Run over it with the Jaxi to start a challenge. Collect all the musical notes before time runs out to unlock a Power Moon.
60. Strange Neighborhood
In Tostarena Town, find a rocket on top of a building. Capture the rocket to fly to a secret challenge area. Navigate the rotating buildings to reach the Power Moon at the end.
61. Above a Strange Neighborhood
While in the same area as Power Moon 60, you’ll notice a stack of three Goombas and a set of floating blocks. Jump onto the center block and then up to reveal a hidden block. Use this hidden block to reach a second Power Moon above.
62. Secret Path to Tostarena!
This Power Moon is accessed via a warp painting in another kingdom. The painting’s location depends on your progression:
- If you visited Lake Kingdom first, head to the Courtyard checkpoint. Dive into the pool to find a warp painting at the bottom.
- If you visited Wooded Kingdom first, go to the Forest Charging Station checkpoint and interact with the scarecrow to reveal platforms. Climb up, and you’ll find the warp painting.
The painting will transport you to the Sand Kingdom, where the Power Moon awaits.
63. Found with Sand Kingdom Art
In Tostarena Town, locate the hint art on a wall east of the Odyssey. The art depicts a clue leading to Bowser’s Kingdom. Travel there and warp to the Souvenir Shop checkpoint. Ground pound the third rock from the right of the flag (excluding the one with the flag itself) to reveal the Power Moon.
64. Jammin’ in the Sand Kingdom
Find Toad on a rooftop in Tostarena Town. He’s wearing headphones and wants to hear a specific track. Play the song “Broodals Battle” from your list of music. He’ll reward you with a Power Moon for his jam session.
65. Hat-and-Seek: In the Sand
Talk to the Cap Kingdom resident near Tostarena Town. He’s looking for his friend, who is hiding among a group of Tostarenans. Look for the Tostarenan wearing a sombrero with eyes like Cappy. Speak to him to earn the Power Moon.
66. Sand Kingdom Regular Cup
In the northwest corner of the map, find a Koopa near a leaderboard. Talk to him to start a race. Use the Jaxi near the starting line to quickly reach the goal in Tostarena Town. Win the race to collect the Power Moon.
67. Binding Band Returned
Head to a small, misshapen hole in the ground northwest of the Inverted Pyramid. Jump inside and find yourself in an underground area. Use the slingshot to reach the Binding Band. Perform a ground pound on top of the diamond to reveal a Power Moon.
68. Round-the-World Tourist
This Power Moon is part of an ongoing quest. Start by speaking with the Tostarenan near the taxi south of Tostarena Town. He’ll mention traveling to different kingdoms. Follow his journey to these locations:
- Metro Kingdom
- Cascade Kingdom
- Luncheon Kingdom
- Moon Kingdom
- Mushroom Kingdom
When he finally returns to the Sand Kingdom, he’ll reward you with this Power Moon.
69. Peach in the Sand Kingdom
After defeating Bowser, visit the Inverted Pyramid. Princess Peach is standing at the edge, enjoying the view. Talk to her, and she’ll give you a Power Moon.
70. Mighty Leap from the Palm Tree!
At the Oasis, climb the tallest palm tree near the checkpoint flag. Perform a backflip to collect the Power Moon floating above it.
71. On the North Pillar
Ride the power line connecting the ruins to the Inverted Pyramid. As you travel, jump off midway to land on a pillar with the Power Moon.
72. Into the Flowing Sands
At the ruins, look for a Power Moon sitting in plain sight on the quicksand slide. Stand on a higher platform and jump down to collect it.
73. In the Skies Above the Canyon
From the Tostarena Ruins Round Tower, head west to find moving platforms. Stand on one of the platforms and jump off just before it descends to reach the Power Moon hovering in the air.
74. Island in the Poison Swamp
Ride a Jaxi to the middle of the poison swamp on the eastern side of the map. The Power Moon is sitting on a small mound in the swamp.
75. An Invisible Gleam
Capture a Moe-Eye near its habitat and head to the pillars with vertical lifts. Use the Moe-Eye’s sunglasses ability to reveal an invisible glowing spot on the second pillar. Ground pound this spot to uncover the Power Moon.
76. On the Eastern Pillar
This is one of the trickiest Power Moons to collect. Start at the Tostarena Ruins Sand Pillar and capture a Bullet Bill. Fly to a leaning column east of the ruins. Turn to face the ruins and wait for another Bullet Bill to approach. Capture it and boost toward a slanted column to the east, then toward the tall pillar where the Power Moon is located. Boost and shake your controller to reach the Moon before the Bullet Bill explodes.
77. Caught Hopping in the Desert!
In the southwestern part of the map, look for a group of rabbits. One of them glows. Chase and capture it by throwing Cappy to stun it, then collect the Power Moon.
78. Poster Cleanup
In the northwest ruins, find a building covered in wedding posters. A local Tostarenan will ask you to remove them. Use Cappy to peel off every poster, revealing the Power Moon as a reward.
79. Taking Notes: Running Down
Near the southwestern desert, find a glowing treble clef. Use a Jaxi to run through the musical notes that appear. Line yourself up carefully to collect them all before time runs out to earn the Power Moon.
80. Taking Notes: In the Wall Painting
In the 2D mural at the Tostarena Ruins Round Tower, you’ll notice a treble clef. Touch it to start a music note challenge. Collect all the notes before the timer ends to claim the Power Moon.
81. Love at the Edge of the Desert
At the northwest edge of the map, find a Goombette. Capture a nearby Goomba, then walk all the way to her location. Once she sees the Goomba, she’ll swoon and reward you with a Power Moon.
82. More Walking in the Desert!
Return to the sombrero-wearing Koopa to start a second Trace Walking Challenge. This time, you’ll need to score 90 points. Study the track closely and use nearby objects to guide your walk. Completing the challenge earns you a Power Moon.
83. Sand Kingdom Master Cup
Speak to the Koopa racer in the northwest ruins for a rematch. Use the same strategy as the first race (Power Moon 66) by jumping onto the Jaxi near the start to quickly reach the finish line.
84. Where the Transparent Platforms End
At a grey warp pipe near Tostarena Town, enter to find a room with invisible platforms. Capture a Moe-Eye and use its sunglasses ability to navigate the paths. Reach the end of the maze to grab the Power Moon.
85. Jump Onto the Transparent Lift
In the same area as Power Moon 84, capture the Moe-Eye again. Stand on the second long invisible platform and wait until it nears the wall. Drop down onto a lower platform to find a key. Use the key to unlock a second Power Moon.
86. Colossal Ruins: Dash Jump!
Near the Tostarena Ruins Entrance, enter a grey pipe. Use the dash flowers to speed through the area and reach the Power Moon waiting at the end.
87. Sinking Colossal Ruins: Hurry!
In the same area as Power Moon 86, grab the golden key while navigating the room. Return to the finish line with the key to unlock another Power Moon.
88. Through the Freezing Waterway
In the northeast desert, enter a grey pipe. Use captured Gushens to navigate the room, boosting through water sections to reach the Power Moon at the end.
89. Freezing Waterway: Hidden Room
In the same area as Power Moon 88, explore the upper-left section of the room after the first set of gold rings. Use a Gushen to reach a hidden ledge where the Power Moon is located.
Congratulations! You’ve now collected all 89 Power Moons in the Sand Kingdom. Let me know if you need a guide for another kingdom!
▶ Wooded Kingdom ▶